


|
Step 1 - Introduction & Preperation Step 2 - Drawing & Building your Car Part 1 Part 2 Part 3 Step 3 - Coloring your Car |
Step 4 - Adjusting Car Scale & Alignment Step 5 - Adding Car Wheels Step 6 - Setting up Car Stat & Physics Step 7 - Test Driving your Car |
|
Step 6 - Setting up Car Stat & Physics
The Stat & Physics of the car defines how the car performs in the game! When you reach this step you should start thinking about what kind of a car is your car. Is it a fast far? Is it a destructive one? Should it be strong? How about the stunts it can perform? You need to think about all this to get a vision of your car to proceed. Let's start first by defining the Stats & Class of the car, open the "Stats & Class" tab in the 3D Edit. To start you will need to choose an NFM car that you think is most similar to your car. (If you don't think your car similar to any of them, that's ok, just choose any car.) 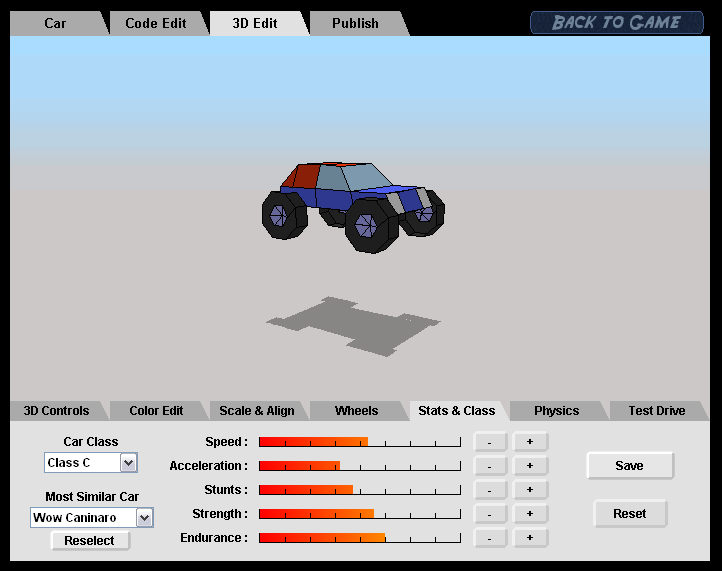
Five stats will appear: Speed, Acceleration, Stunts, Strength and Endurance. These are the five main stats that ultimately based on, a car gets defined in Need for Madness. The Car Maker balances these stats as you increase or decreases any of them. Notice that if for example you increase the Speed, the rest of the stats will get decreased a bit. Also if you decrease a stat, the rest of the stats will be increased a bit. If you up the Class of the car ALL the stats increase equally. And if you down the Class ALL the stats will decrease equally. The definition and explanation of each stat's effect: Speed: The top speed your car can reach. Acceleration: The rate at which your car gains speed (the time it takes for your car to reach the top speed). Stunts: The ability of your car to perform stunts (effects how fast it rotates in the air and how high it jumps...ext). Strength: The amount of damage your car inflects on other cars when it hits them. Endurance: The amount of hits your car can take (how much it can endure) before getting wasted. Set up the stats for your car and don't forget to press "Save" when finished! These are the stats we decided to give for our car: 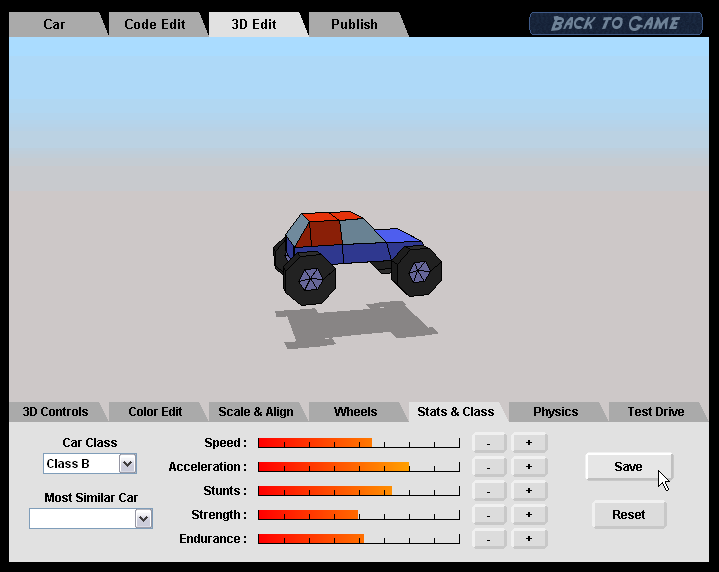
Have you set up the stats for your car? Good, now let's move onto defining the physics of the car. Open the "Physics" tab in the 3D Edit and once you do you will find physics variables to modify. To learn about the function of each variable simply click on the variable name: 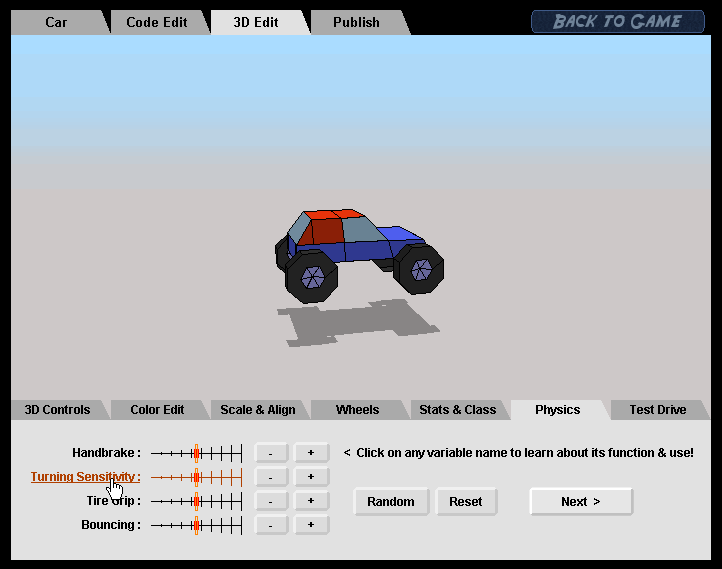
Please read what each variable does to learn about how it affects your car and define it according to how you would like your car to perform. You can also click the "Random" button which will give random values to all the variables, use this if you are not sure about your car's performance and want something by luck! Click "Next" to define the next set of physics variables, finish defining them and then click "Next" again and you will reach this: The Crash Test: 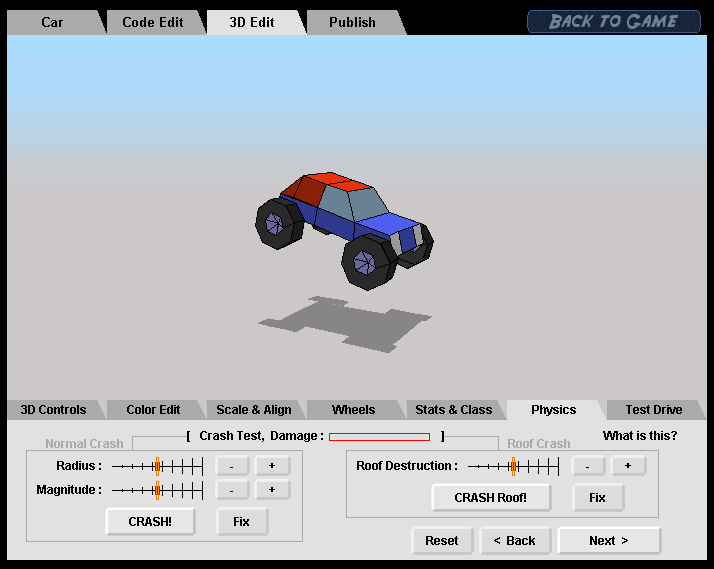
The crash test is a test of crashing your car to see how it looks like when crashed! Click the "Crash" button Repeatedly until your car gets wasted. Watch as you car gets crashed to see how it looks like damaged. For example look at your car when its damage is at 50% and ask our self is this how it should look like at 50% damage? Also check the way your car looks like when its damage is at around 95% percent (just before it gets wasted). Based on what you see, adjust the variables: "Radius", "Magnitude" and "Roof Destruction" to make your car look the way you want when crashed, adjust theses variables and fix then crash the car again to see the results. Click on any of these variable names as well to learn about their effect on the crashing. Please Note: Adjusting these variables does NOT affect your car damage withstanding or endurance whatsoever! These variables only affect the way your car LOOKS when crashed! Perform the crash test more then once until you are satisfied with your cars crashed look. 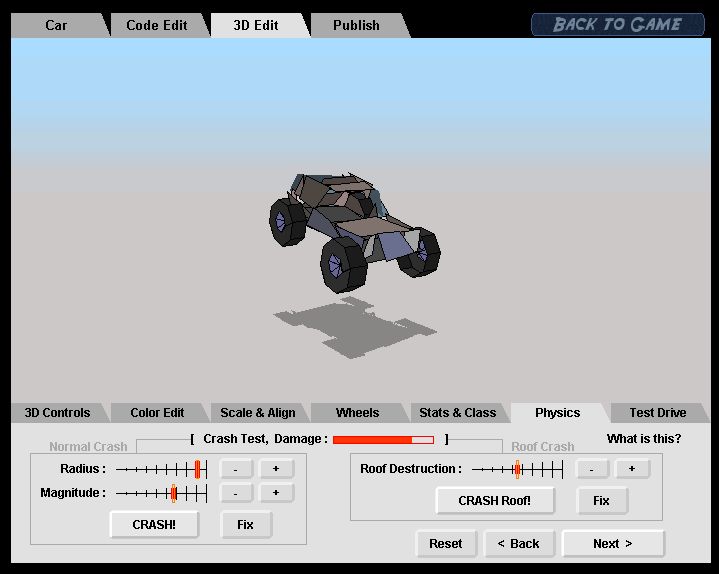
When defining the crash look, try to imagine what material your car would be built with if it was in real life. If your car was supposedly built out of strong metal (like Masheen) then its body shouldn't get too distorted when crashed. But if your car was made out of a fiberglass material (like La Vita Crab) then its body should get quite distorted when crashed. After completing the crash test click "Next" to choose the type of engine for your car! The type of engine you select has nothing to do with your car's performance at all, it is only to define the its engine sound. What you are selecting is the sound of your car's engine. Select an engine type and use the listening buttons to listen to that engine at different states: 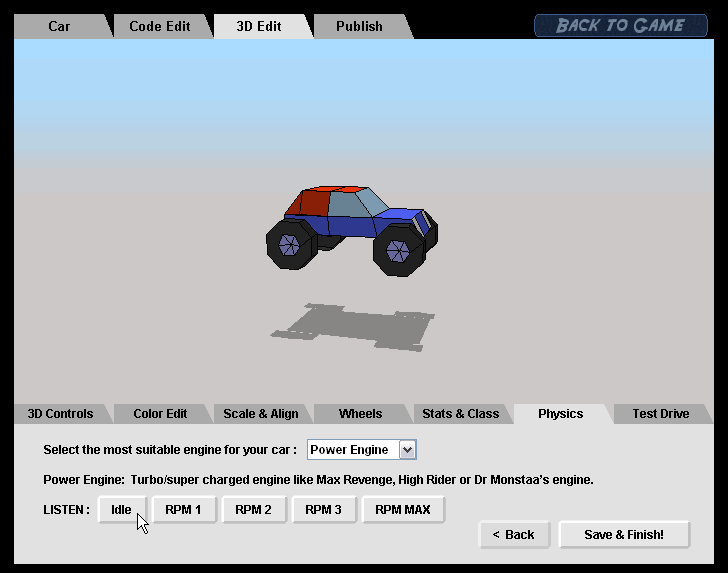
After selecting your car's engine, press "Save & Finish". Have you defined your car's physics? Congratulations! Your car is now officially finished and is ready for a test drive!
|