


|
Step 1 - Introduction & Preperation Step 2 - Drawing & Building your Car Part 1 Part 2 Part 3 Step 3 - Coloring your Car |
Step 4 - Adjusting Car Scale & Alignment Step 5 - Adding Car Wheels Step 6 - Setting up Car Stat & Physics Step 7 - Test Driving your Car |
|
Step 2 - Drawing & Building Your Car
Now that you know how to measure, color and create a car piece from the drawing, it is time to do the same for more pieces of our car. 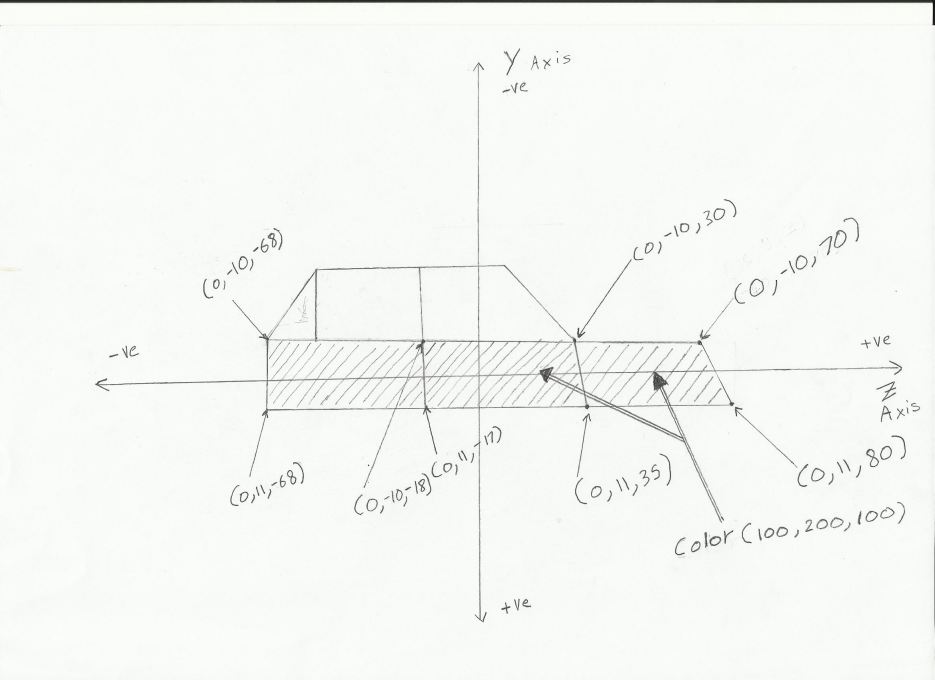
In the drawing above, we have measured the points of 2 more pieces and decided they would have the same color as the first piece. Have you measured more pieces with the same color as your first piece in your drawing yet? Please do. Now let's enter these pieces in the Car Maker: 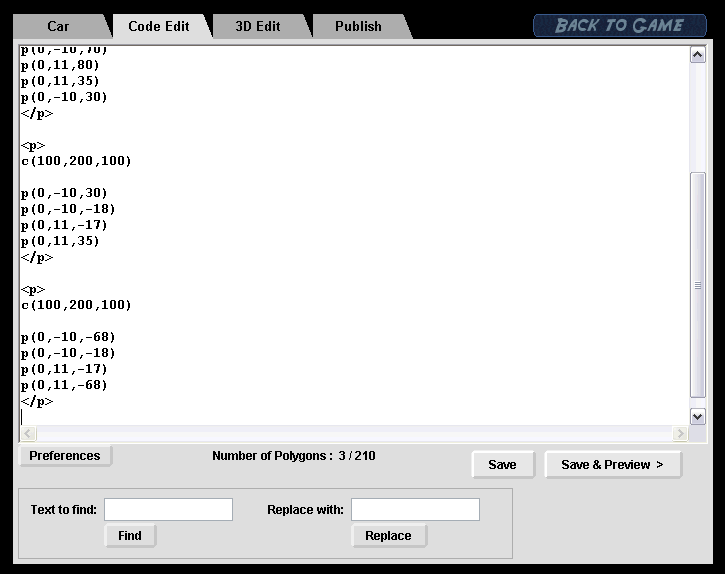
Have you entered your pieces in the Car Maker? Now let's measure some more car pieces but give them a different color! 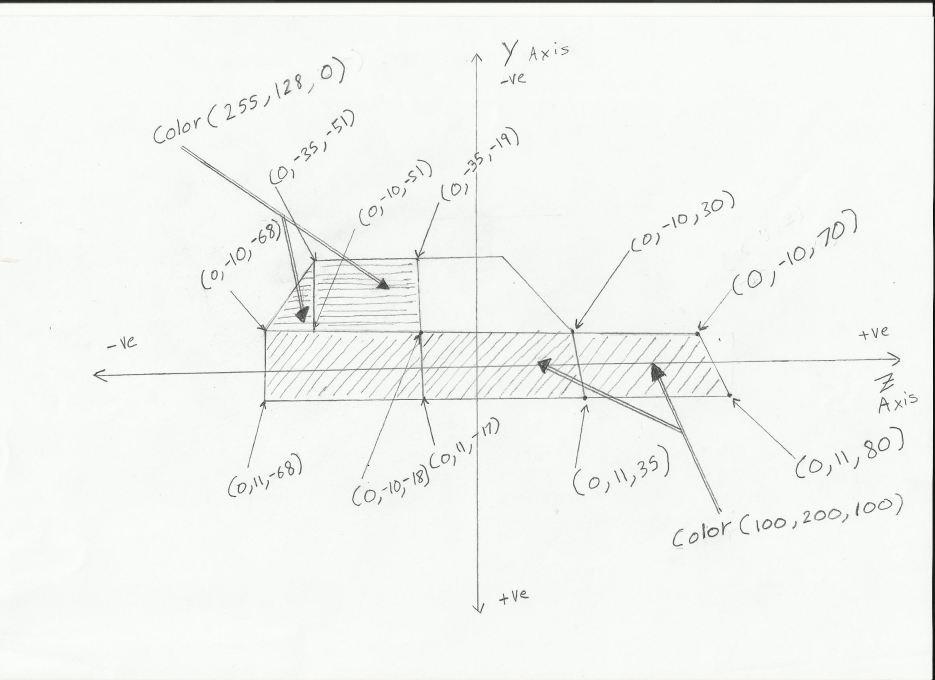
In the drawing above we have measured the points of 2 pieces that are in the top area of the car and we gave them a different color. We gave them the RGB color (255,128,0) which is an Orange color. Have you measured more pieces of your car and gave them a different color? Now let's enter these pieces as well and preview them in the "3D Edit": 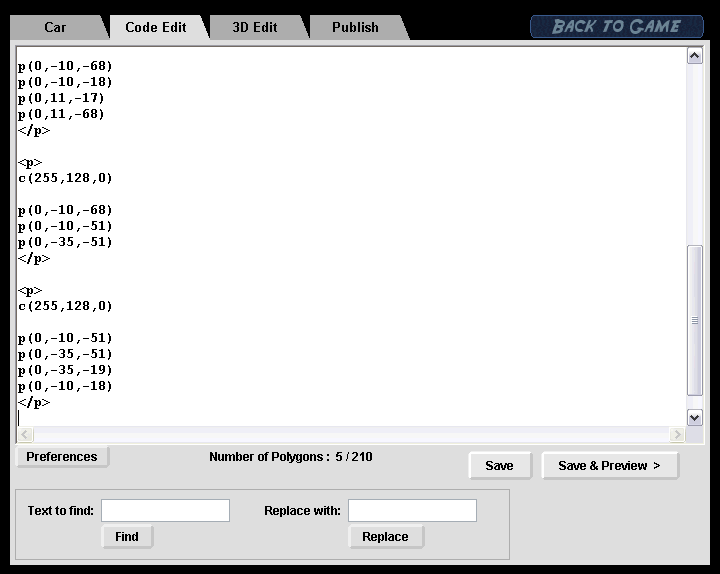
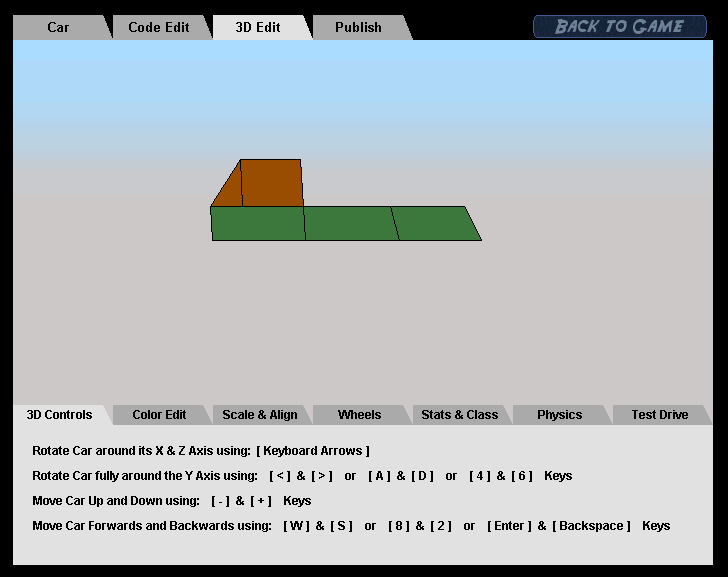
Have you done all the above for your car yet? Good. Now we are going to measure the last piece remaining in our car drawing but we are not going to give that piece a color as we are going to define it as glass! 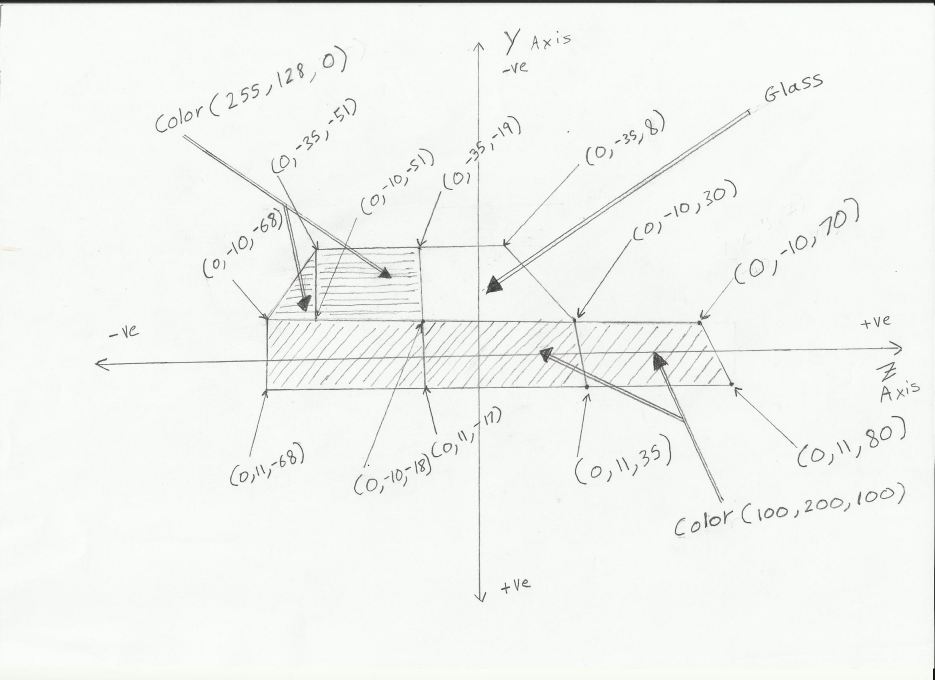
To define a piece as glass instead of writing c(R,G,B) for it's color, we write: glass(), as demonstrated below: 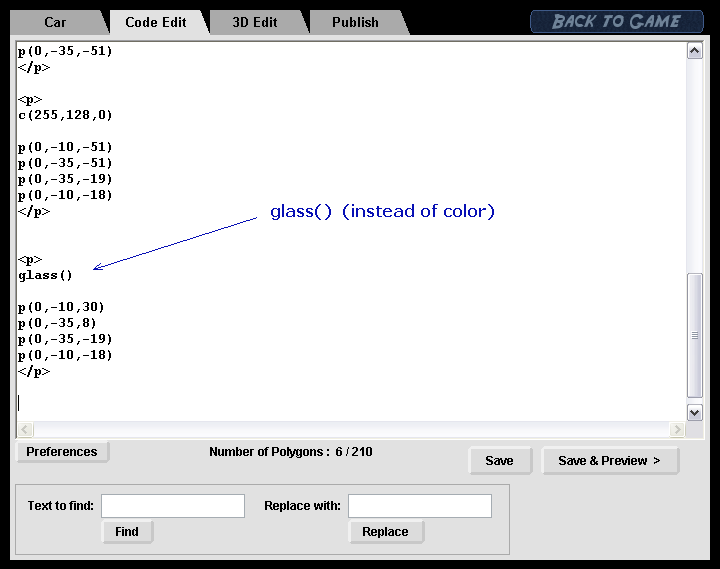
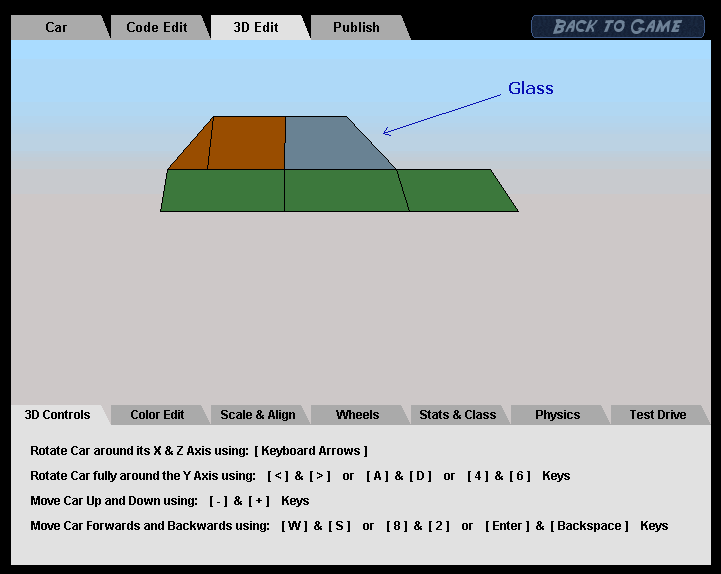
Have you defined a piece in your car as glass? Defining a piece as glass makes it take a glass color, a color that depends on the color of the current stage's sky. It also makes that piece break differently when the car is crashed. As you can see now we have defined and created all the car's pieces that we have drawn so far, please do the same as well for your car. If you still have car pieces not defined and created from your drawing, now is the time to do them all. Now we are finished with one side of the car! We have successfully created the right side of the car! Let's show you some functionality in the Car Maker that can be helpful to you in the future. Try this, try selecting/highlighting one piece in the Code Edit (using the mouse cursor) and notice the options that appear when you do: 
Select a Piece and try clicking "Show in 3D" to see what happens. What will happen is that the piece you selected will get highlighted in the 3D Edit! This option will help you keep track of which piece is which as you build your car. You can also select more then one piece at a time and the same will apply as well. There is no need to try the "Mirror Along..." options just yet though! If you can notice now: We have built the right side of the car but we have built it flat on the X Axis, as we gave all the points in all the pieces an X value of 0. Now its time to give our car some depth in the X Axis! We are going to do that simply by pushing all the car pieces out towards us by 40 (4 cm x 10). All we will need to do is replace all the p(0,...,...) with p(40,...,...) Think about it and imagine it for while. An easy way to replace all the p(0,...,...) with p(40,...,...) without typing too much is to use the search and replace option: Place the cursor at the top of the code and type in the search box "p(0," and in the replace box "p(40," then press Replace. 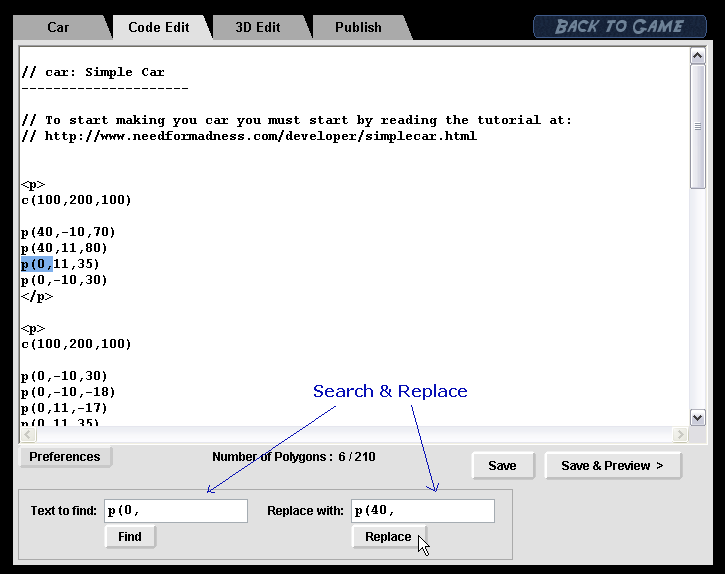
Have you replaced all the p(0,...,...) with p(40,...,...) for your car yet? Now let's bend the top part of the car inwards in the X Axis so that the shape of the car from the side has a bend and is more realistic. We can do that simply by finding all the points of the car that are at the top, (all the points that have Y = -35) and push those inwards in the X Axis by changing all their X values from X = 40 to X = 30 for example. 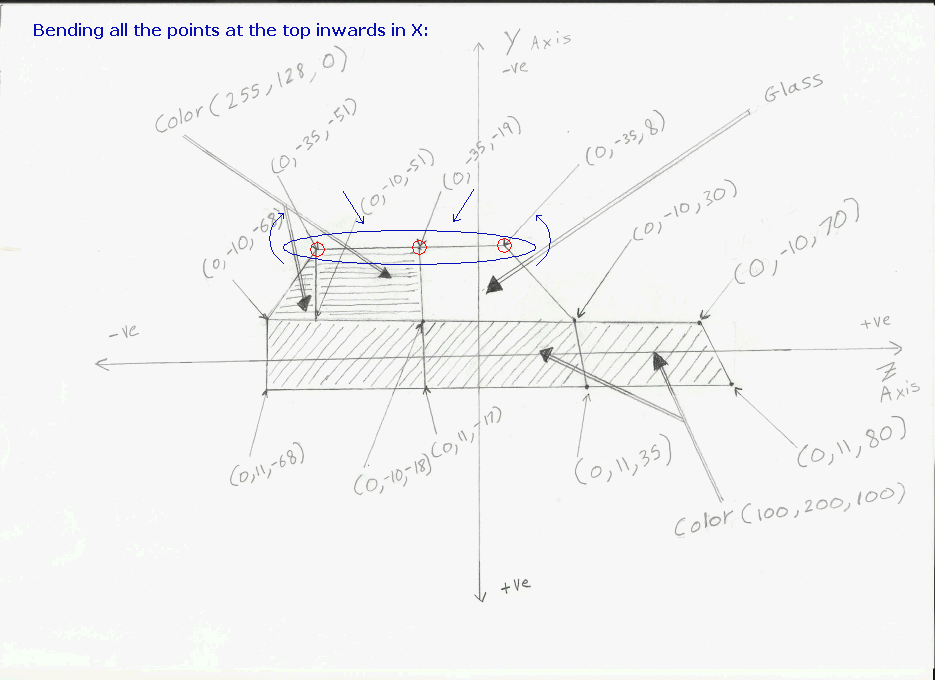
We can do that simply bye replacing all the "p(40,-35," with "p(30,-35,", using the search and replace option as well. Please do the same for your car as well! Of course for your car all the top points won't be at Y = -35 as they probably have a different Y value, they may even have different Y values amongst them all together (if the roof of your car is not a straight line). If you can't use the search an replace option, do it manually by finding each point at the top of your car from your drawing and changing its X value from 40 to 30. And this is what we have after bending the top part of our car: 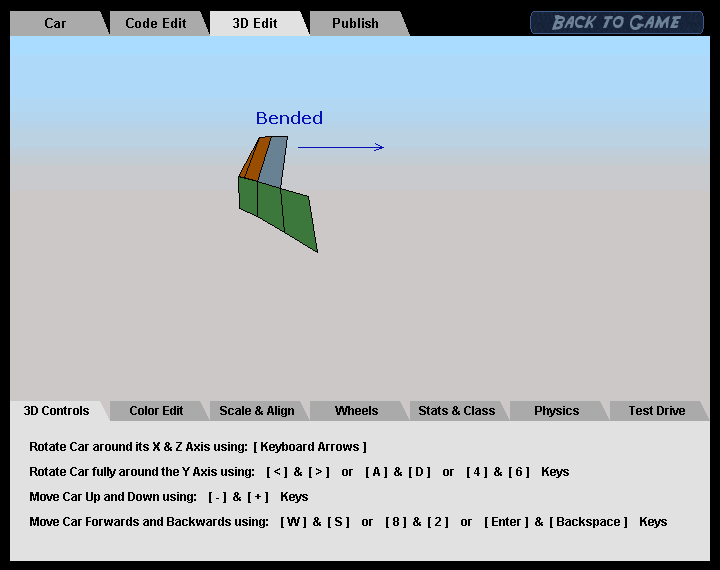
Take a moment to understand all what we have done perfectly. Now we have the right side of the car in the correct place in the X Axis, it has a bend at the top, it is complete. We are now ready to make the left side of the car! Is your car's right side also complete and ready? Please make sure it is. We need to create the left side of the car and there is a very easy way to do it. Simply select all the Pieces written in the code edit, select them all from top to bottom and click "Mirror Along the X Axis". 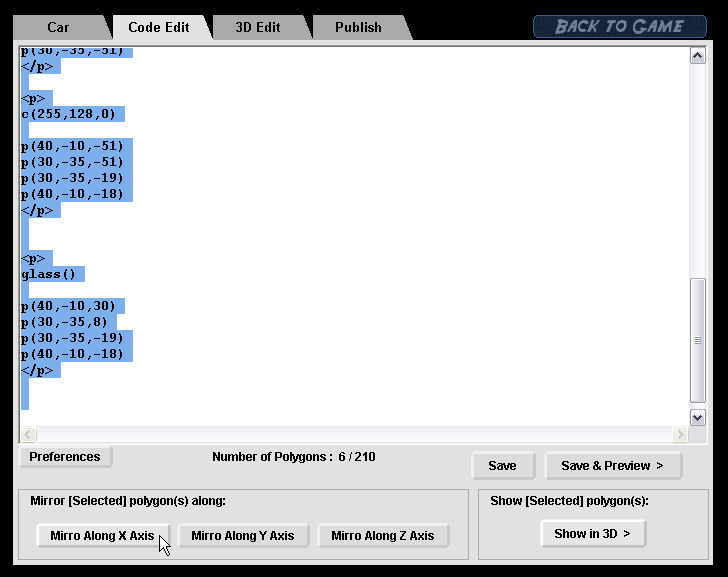
Once you click "Mirror Along the X Axis" all the Pieces selected get mirrored and written right below the selected pieces. The mirrored pieces get written with a mark at their top stating that below is the mirror of the pieces above: 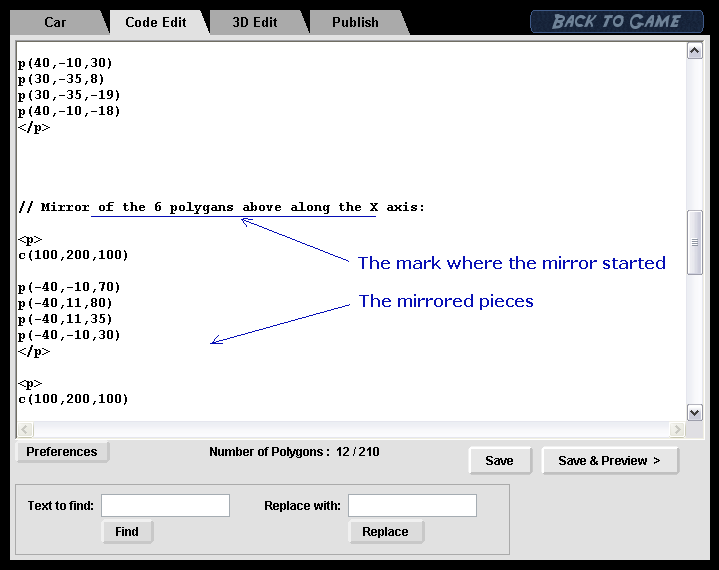
Have you mirrored you right side of the car yet? If you notice all what the mirror function really did is rewrite the same pieces but while giving all the X locations a negative value. So all the p(40,…,…) where rewritten as p(-40,…,…) (and if they had a negative value initially then they would have been tuned positive). Similarly the same occurs if you where to mirror a piece along the Y or Z Axis, the Y or Z locations would have been given an opposite -ve or +ve value. Now let's look in the 3D Edit to see the left side of the car now present: 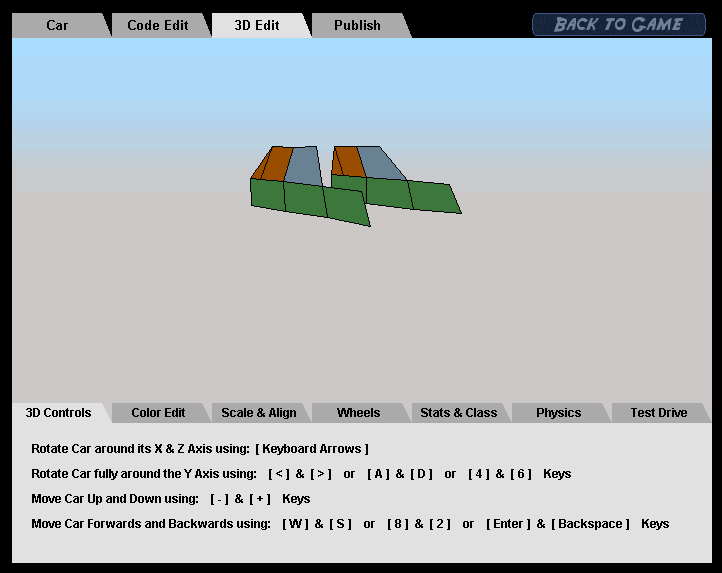
Can you see both sides for your car as well? In the Car Maker a "Piece" is called "Polygon", that's because it is it's true name, we only used the term "Piece" in this tutorial to make things simpler. The p in <p> truly stands for Polygon not Piece. The maximum number of Polygons/Pieces allowed for a car is 210. That is why there is a Polygon counter in the Code Edit that tells you how many Polygons you have created so far out of the 210 allowed. Of course 210 is a lot of Pieces and it is very unlikely that it would ever be exceeded. 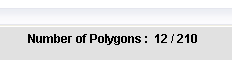
Now that we have both the right and left sides of the car symmetric and ready, its time to move on to Part 3!
|