


- Making a new Stage - Building your Stage - Previewing your Stage - Coloring your Stage World - Setting the Atmosphere for your Stage - Defining the Number of Laps for your Stage - Setting up the Sound Track for your Stage - Composing and Mixing your own MOD Tracks - Test Driving your Stage - Redefining the Checkpoint Order of your Stage - Accessing your Stage Code - Publishing your Stage :: Making a new Stage: To make a new stage simply open the Stage Maker and click the button that says "Make new Stage". 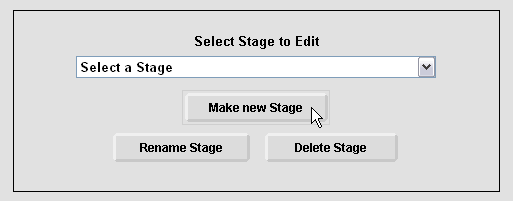 Enter a name for your new stage, select the start line type for your stage then press "Make Stage". 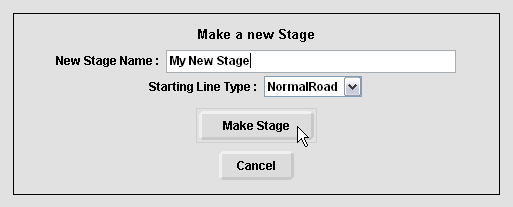 Click on the "Build" tab to starting building and constructing your stage.  :: Building your Stage: Start building and constructing your stage by selecting a part you would like to place from the "Part Selection" menu. Parts are categorized as Roads, Ramps, Obstacles, Checkpoints and Fixing Hoops. It is advised to start building your stage first by placing all the road parts (or the main road parts that define the path of your track) then placing the ramp, obstacle, checkpoint and fix hoop parts afterwards over and on top of the road parts. To place a part simply select that part, place the mouse over the "Building Area" then click the mouse button once. Of course when placing a part it should normally be attached to other parts already in the stage and it should be attached and aligned correctly. Click "Rotate" to rotate the selected part +90 degrees, click rotate more then once to rotate the part +90 each time, use this to attach the selected part with the correct alignment/angle needed. 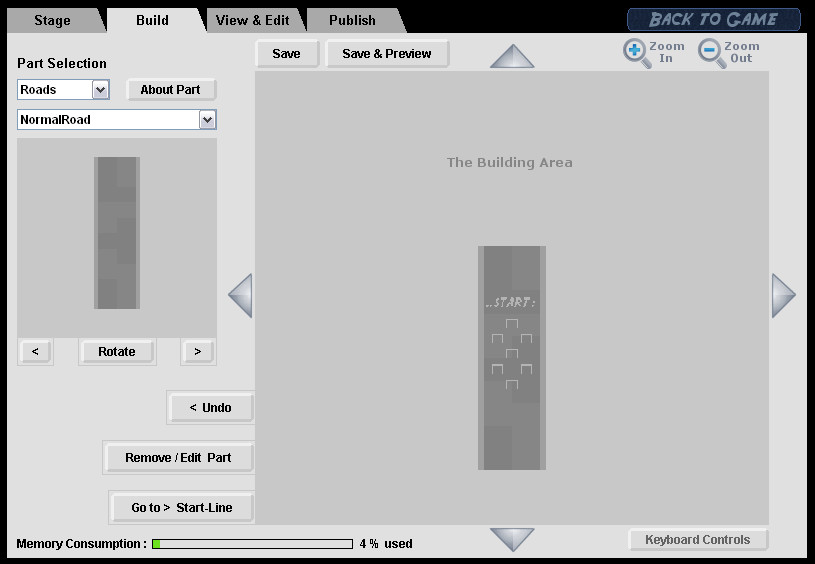 Important: Click the "About Part" button for each part you select to learn about how and why it is used and which other parts it attaches to correctly! Make sure that any two parts you are about to place and attach together are meant to be attached to each other. Click the "< Undo" button to undo any of your last incorrect actions. Click the "Remove/Edit Part" button to edit, copy or remove any already placed part in the stage. Take a look at the default stage that comes with the Stage Maker called: Example Stage - with all parts used in it. It is a stage that has every single track part that can be used, placed in it and used. That stage is meant to be a good example of showing how each part is normally used and what it normally attaches to correctly. Please use this stage as a reference whenever you are puzzled about how a specific part is used and where, find it in the example stage and see how it is used and attached. To find out the name of any part in this example stage, click the "Remove/Edit Part" button, click on any part in the building area and select "Copy". This will copy the chosen part which will make it automatically selected in the Part Selection displaying its name. Scroll through the building area using the triangular scroll buttons around it. Zoom in and out using the zoom buttons found in the right-top corner. Click the "Keyboard Controls" button to find out how to scroll and zoom using the keyboard directly. Click the "Go to > Start-Line" button to find your way back to the start line whenever you get lost in the stage. Press "Save" when you are satisfied with you have built so far, or press "Save & Preview" to save and preview what you have built in the same time. Don't forget to press Save! :: Previewing your Stage: As you construct your stage, to preview anything you build, click on the "View & Edit" tab. This tab will display your stage in 3D where you will be able to move around in it and navigate through it. 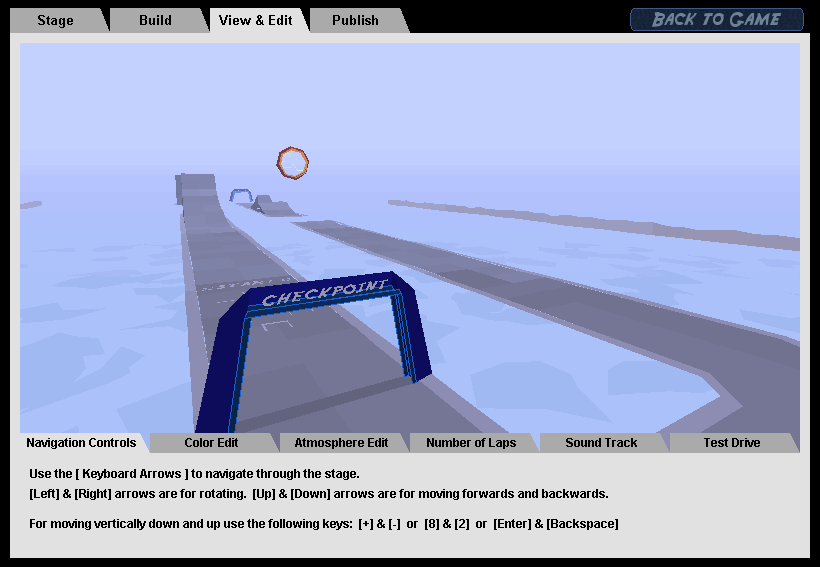 :: Coloring your Stage World: To color your stage's world, go to the "Color Edit" tab in the stage preview. Through it you will be able to edit your stage's sky, fog and ground colors.  > It is recommended making the color of the ground darker then the color of the sky to give a more realistic effect and a better looking stage. Press Save when you are finished with coloring. :: Setting the Atmosphere for your Stage: Set the atmosphere for your stage by going to the "Atmosphere Edit" tab in the stage preview. The atmosphere RGB mask basically controls the overall color of the stage with everything in it all together. You can use it to color the stage in anyway you please; you can make it a blue stage, a green stage, an orange stage and so on. You can also use it to make the stage darker or brighter, basically night or day. Once the RGB values of the atmosphere are below a certain value where the stage becomes dark enough, the stage is then considered to be a night stage and the car lights become switched on during driving in that stage.  Edit the fog density and nearness through the fog properties option depending on how you would like your stage to look like. Don't forget to press Save when done! :: Defining the Number of Laps for your Stage: To define the number of laps for your stage simply go to the "Number of Laps" tab, select the number of laps and press Save!  :: Setting up the Sound Track for your Stage: To setup the sound track for your stage first select a MOD Track from the drop down list on the left, browse through the available tracks (in the Play List) and press "Play >" to listen to any track. Once you have found a MOD Track that you like that is suitable for your stage, click "Set as the stage's Sound Track >". This will place the name of the track in the Sound Track box, then press Save. If you would like to have no Sound Track for your stage, remove any track name in the Sound Track box; where it should say "No Sound Track set." and press Save.  To add a new MOD Track from a file to the play list in order to use as the stages' Sound Track, press "Add a new MOD Track from a file...". You can find many MOD Tracks at modarchive.org it has a humongous list of module tracks, however only module that are MOD that end with ".mod" extension are accepted in the game. All the tracks in the Stage Maker's play list have been brought from there, if you search for any track in the play list using its name at modarchive.org you will find it. Finding a good track that you like at modarchive.org can sometime take time; we usually search for tracks through browsing by file name, choosing a random alphabet letter, choosing a random page number for that letter then listening to each track one by one. http://modarchive.org/index.php?request=view_by_list&query=A To listen to any track quickly, download it and listen to it in Winamp (or any other player you may have that plays MOD Tracks). Winamp is an excellent program for playing MOD Tracks, you can download it from http://www.winamp.com/. Save the tracks that you like and place them in your Stage Maker play list. :: Composing and Mixing your own MOD Tracks: MOD Tracks are actually a form of open source music that can be edited and remixed. To compose and remix your own MOD Tracks you will need a MOD tracker program. Using a tracker program you can open any existing MOD Track you have and edit it. You can also compose your own MOD Tracks from scratch. Having some musical knowledge of course helps. A good program for editing and composing MOD Tracks is: OpenMPT Download it here: http://openmpt.org/download/ OpenMPT is a good program that we recommend using, however it is not necessarily the best or easiest program out there, as we have not done a lot of research in this area. If you find any other program that you think is better or as good, please let us know about it and share it in the forums for others to use and we will add a link to it here in the future. Find help, discuss and share your MOD composing experiences at the MOD Tracks section of the Stage Maker forums! :: Test Driving your Stage: To test drive your stage, go to the "Test Drive" tab in the stage preview.  It is important to test drive your stage thoroughly to make sure that everything build in it allows you to drive through the stage the way you want it to. :: Redefining the Checkpoint Order of your Stage: The Stage Maker automatically tries to define the Checkpoint order of your stage based on the way you have designed your track. However if you would like to define a custom order for your checkpoints that does not necessarily comply with the track parts placement, or just incase the Stage Maker fails to get the order correctly automatically. You can manually define the Checkpoint order. To manually define the Checkpoint order: In the Part Selection select Checkpoint then click on "Rearrange Checkpoints >" 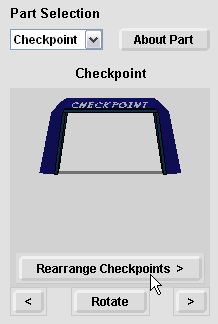 Then click on any Checkpoint in the building area. The first Checkpoint you click on will be defined as the first in the order, the second will be defined as the second in order and so on. 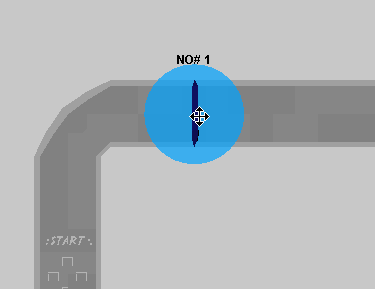 Click on all the Checkpoints in your stage until all is defined, then press Save! :: Accessing your Stage Code: To access the code of your stage open your "mystages" folder that is found in the main Need for Madness folder. You will find all your stages in that folder in the form of text files, open any stage to access its code. To add a new stage from code to your Stage Maker, simply create a new text file in that folder and paste the code in it. You can share your stage codes with friends! :: Publishing your Stage: Publish your stages to the online game through your account, to be able to play your stages in the multiplayer game! You can publish your Stage as a Private, Public or Super Public stage: A Private stage can only be used by its creator/publisher, where no one else can add it to their account to play it or host multiplayer games on it but the creator/publisher. A Public stage can be used by anyone, where anyone can add it to their account to play it or host multiplayer games on it, but not download it! Only the creator/publisher of a public stage can download it and edit it in the Stage Maker. A Super Public stage can be used by anyone, just like the public stage but the difference is, anyone who ads the stage can also download it to the Stage Maker and edit it, they will also be able to get the stage's sound track.  |
